Free Secure Remote HIKVision (or any other brand) NVR Access Using Tailscale
The “p2p” service (its not actually p2p 🤣) that comes pre-loaded onto HIKVision NVR’s is terrible, and bound to be insecure. Lets take matters into our own hands, and setup free and secure remote access via tailscale.
Requirements
- Access to a computer (raspberry pi, homelab, office pc, etc..) that will stay on & connected to the internet to proxy your remote requests.
- The NVR you want to proxy (obviously 🤣)
- Simple networking knowledge
Steps
Lets start by creating a tailscale account - go to https://tailscale.com and create an account with google / any idp you want.
Next, install tailscale on the computer you will be using as the server, as well as whatever you would like to use as clients (phones, laptops, etc..)
https://tailscale.com/download/
Dont login to your account on the server just yet, login on the clients.
Now tailscale is installed and connected (just clients), we can start the proxying.
You will need to find your NVR’s LOCAL IP address. You probably already know this (as this is how you connect to the webui when on the same network), if not, look in your router settings. For this example, my NVR’s IP address is 192.168.88.5. This means that its on the 192.168.88.0/24 subnet, we will need this in a minute.
At this stage, you should also double check that your server / computer can actually access the NVR’s web UI. If so, lets continue.
Run these commands on your server,
1
2
3
echo 'net.ipv4.ip_forward = 1' | sudo tee -a /etc/sysctl.d/99-tailscale.conf
echo 'net.ipv6.conf.all.forwarding = 1' | sudo tee -a /etc/sysctl.d/99-tailscale.conf
sudo sysctl -p /etc/sysctl.d/99-tailscale.conf
(Taken from https://tailscale.com/kb/1019/subnets/)
This will allow your server to proxy traffic from the NVR, to tailscale.
Next, lets start tailscale on the server, with the arguments to proxy the subnet.
1
tailscale up --advertise-routes=<YOUR SUBNET HERE>
For my example:
1
tailscale up --advertise-routes=192.168.88.0/24
It may ask you to sign in, follow the prompts.
Next, lets approve the routes from the admin panel
https://login.tailscale.com/admin/machines
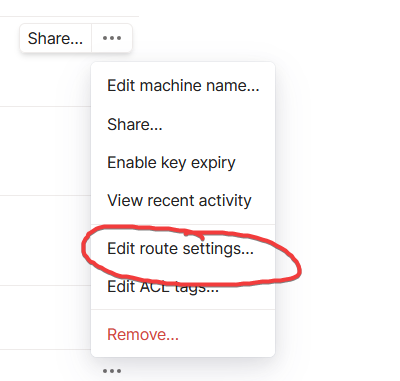
Select the 3 dots for the machine running the server:
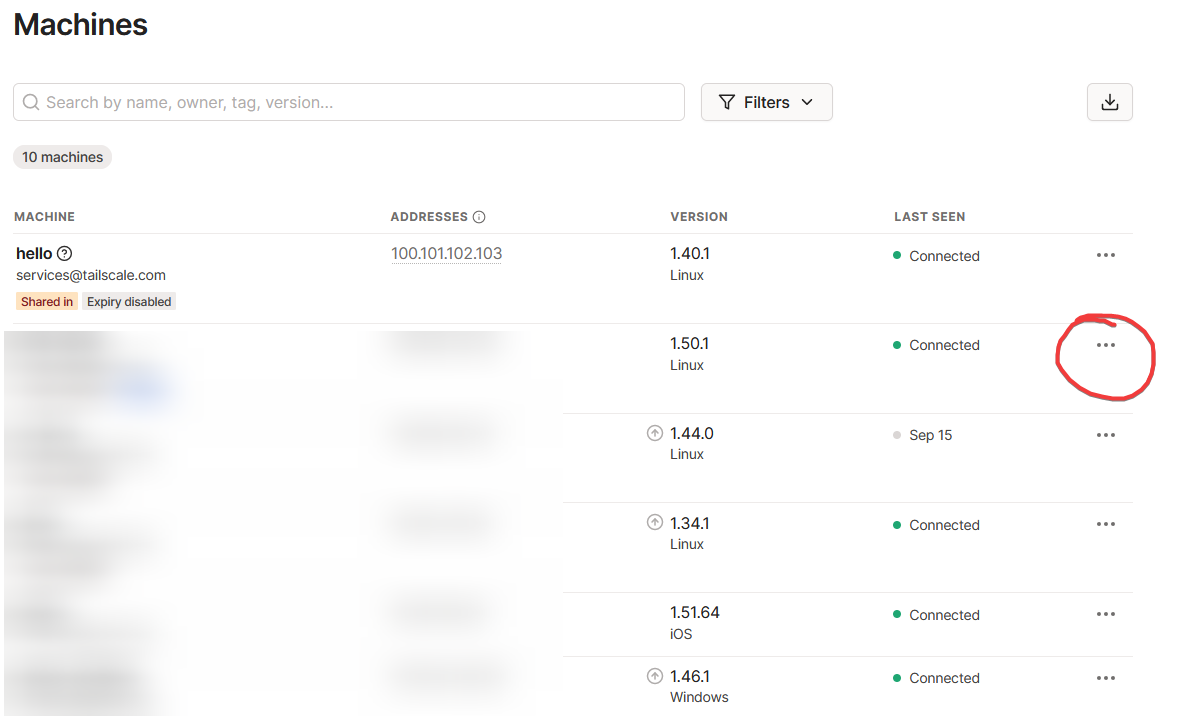
Choose “Edit route settings”
Then enable the route for the subnet that your NVR is on.
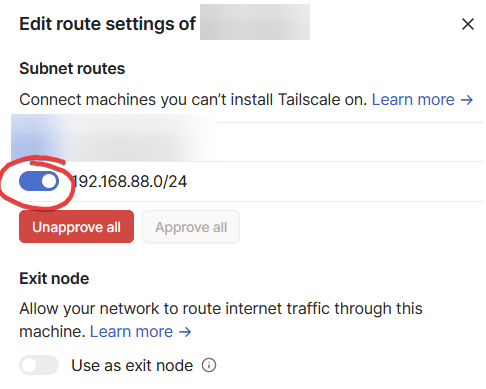
Done! Any client with the tailscale app (& connected) should be able to access the NVR WebUI through the browser / mobile apps.
HikVision Mobile App
Little sidenote for HikVision app users, for some stupid reason, the mobile apps wont connect to the nvr if the ip address is in the “local” ip range, which ours is. Meaning that the mobile apps wont work outside of the network, even with tailscale connected. Little trick I found to bypass is to make a DNS rewrite for ANY random domain name, that points to the local ip of the NVR.
This does require a dns hosting service that can do rewrites. This could be a PiHole, NextDNS, etc.. Here, I am using NextDNS because its free and natively supported by Tailscale. Assuming you already have your tailscale dns setup (info here https://tailscale.com/kb/1054/dns/), you can make a rewrite. Here, I am rewriting nvr.com to 192.168.88.5 (my nvr ip):

Now, do the usual setup inside the mobile app, BUT NOT USING THE 192.xxx IP ADDRESS, USE THE DOMAIN YOU JUST SETUP REWRITES FOR.
Should look like this: 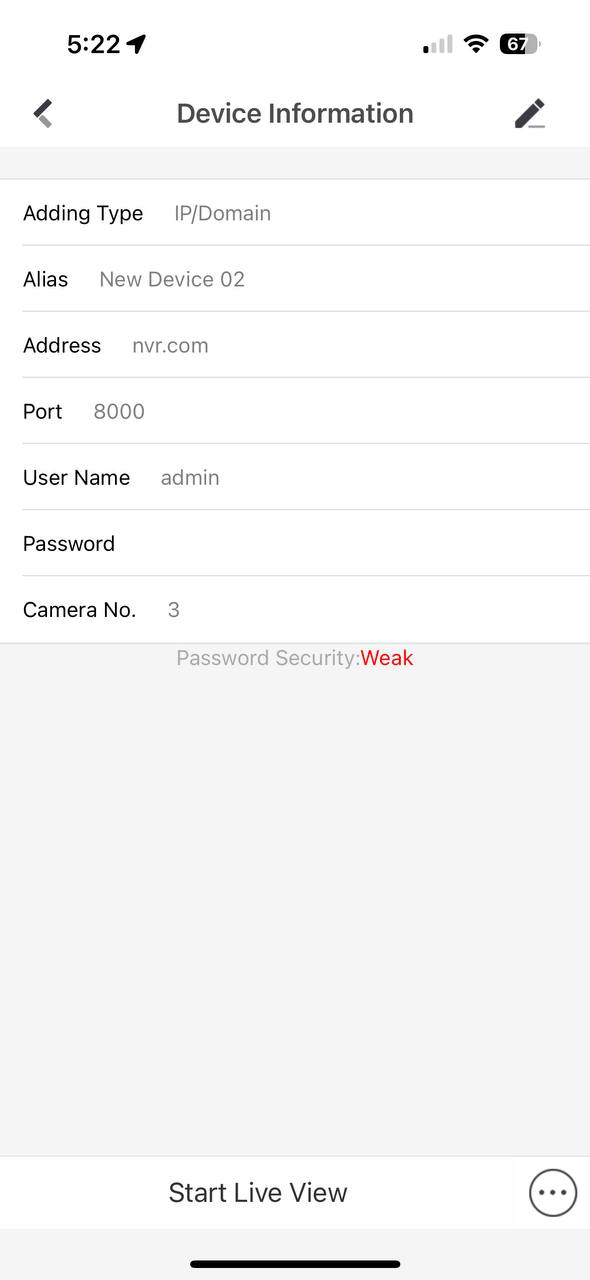
Done!
Have fun with your secure remote access!